
|
Have you ever wanted to paint a night sky? It's a lovely way to spend an afternoon, especially on a wet weekend. Follow my step-by-step video tutorial below to create your own unique piece of art. Mine has a nautical twist (of course), but you could silhouette buildings, animals, mountain ranges... the only limit is your imagination! I've used masking fluid for my stars, but if you don't have any then a good quality gel pen works well too (see how I use mine in the final stages of my artwork). I'd love to see your results- tag me on Facebook or Instagram @andreaenglandart. Leave me feedback and questions in the comments below!
0 Comments
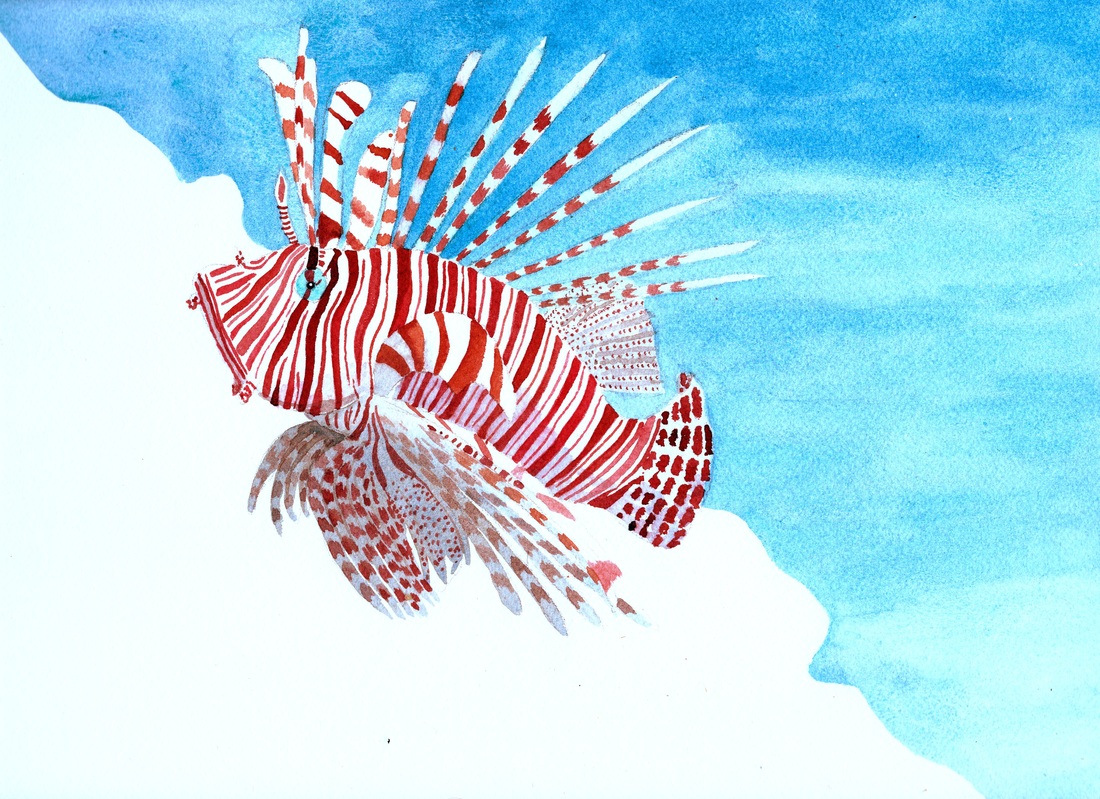 Do you ever find that your opinion of something you've done changes over time? Sometimes a finished painting leaves me very disappointed, then I pull it out years later and love it. Other times I can be really pleased with something, then later inspection leaves me feeling flat. My lionfish was one that gave me mixed feelings- I love the fish itself but worried that I should have painted the reef instead of leaving it white. I tucked it away for a couple of weeks and came back to it. Part of me still regrets not painting the entire background turquoise, but I still love the graphic patterns and shading on the fish. So I scanned it in and decided to have a play digitally. 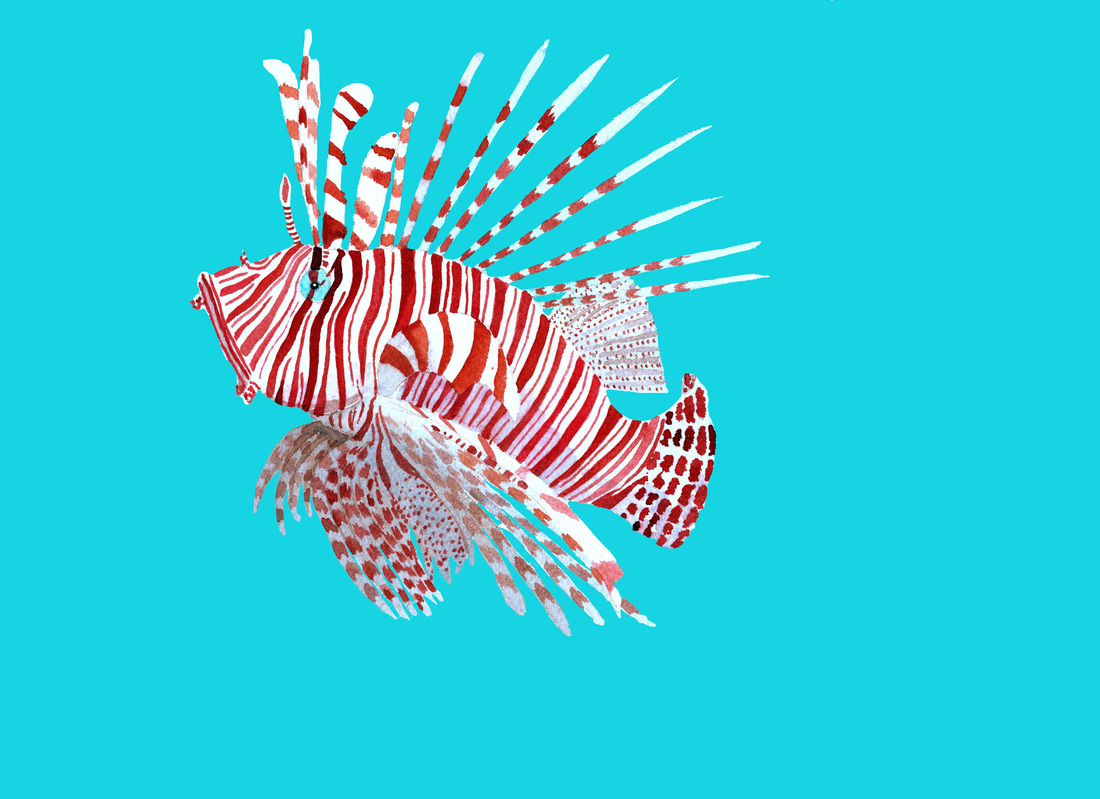 Cutting and copying the lionfish in Photoshop took quite a while, but when I added a solid turquoise background it all became worth it. The fish still has the watercolour feel I love, and the background lets its shine! He's joined my orca and manta ray over on Redbubble. There's something very exciting about seeing my artwork out there on stuff- and feeling that both my watercolour and digital image skills are coming along nicely! Click the images below or the shop link above if you'd like a closer look! 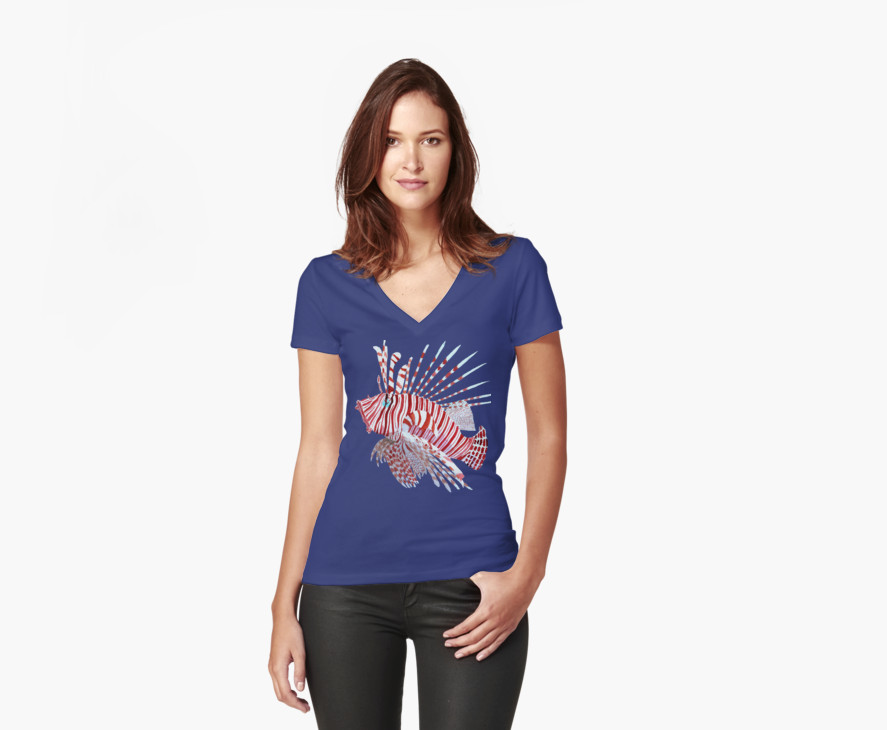 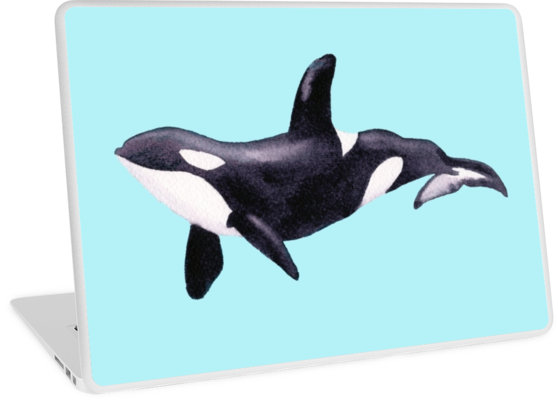 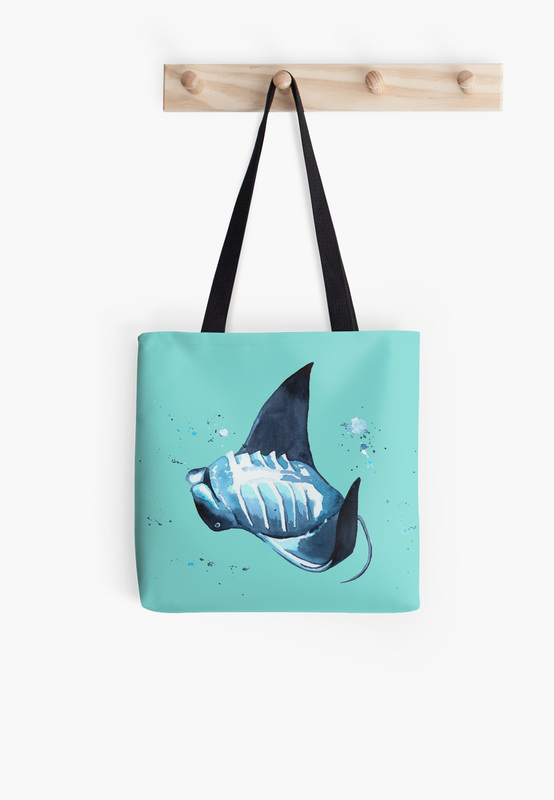 I was very excited when my order of ink samples from Goulet Pens arrived, along with a couple of ink syringes. The syringes are supposed to be used to transfer ink into my fountain pens without creating an eco-disaster, but I soon got distracted by other possibilities! I made a video as I went- I've added more instructions and details about supplies below. I started off by creating the bell shape with some water from a pipette- a water-loaded brush would work just as well. Then I pulled a very small amount of gold ink into the ink syringe and squirted it into the water bubble. It only took a few drops- and watching the ink swirl in the bubble is so pretty! I added the darker red, then used a brush to trail some water to make the tentacles. Once again I squirted ink into the water- occasionally a little too much would come out but I think the blobs add interest. In fact, the inspired me to try drawing straight from the syringe! It was also perfect for adding some little dots, then I used a brush and some water along with turquoise ink to paint the water. A few swirls with a white Posca paint marker was the perfect finishing touch. If you fancy trying this yourself, ink syringes are available from Goulet, and you can pick up a whole rainbow in ink samples from them for about $1.25 per sample (I used Noodlers Apache Sunset, Ottoman Rose and Navajo Turquoise). They also ship worldwide and the samples are so well packaged they survive international transit (I am in no way affiliated with or sponsored by Goulet- I'm just a fan!). You can also drop the ink in from an eyedropper or paintbrush. It will be a bit less precise but equally pretty! If you give this a try, then please let me know how it goes in the comments, send me a link to your pictures or tag me on Facebook or Instagram- @andreaenglandart I'd love to see what you come up with!  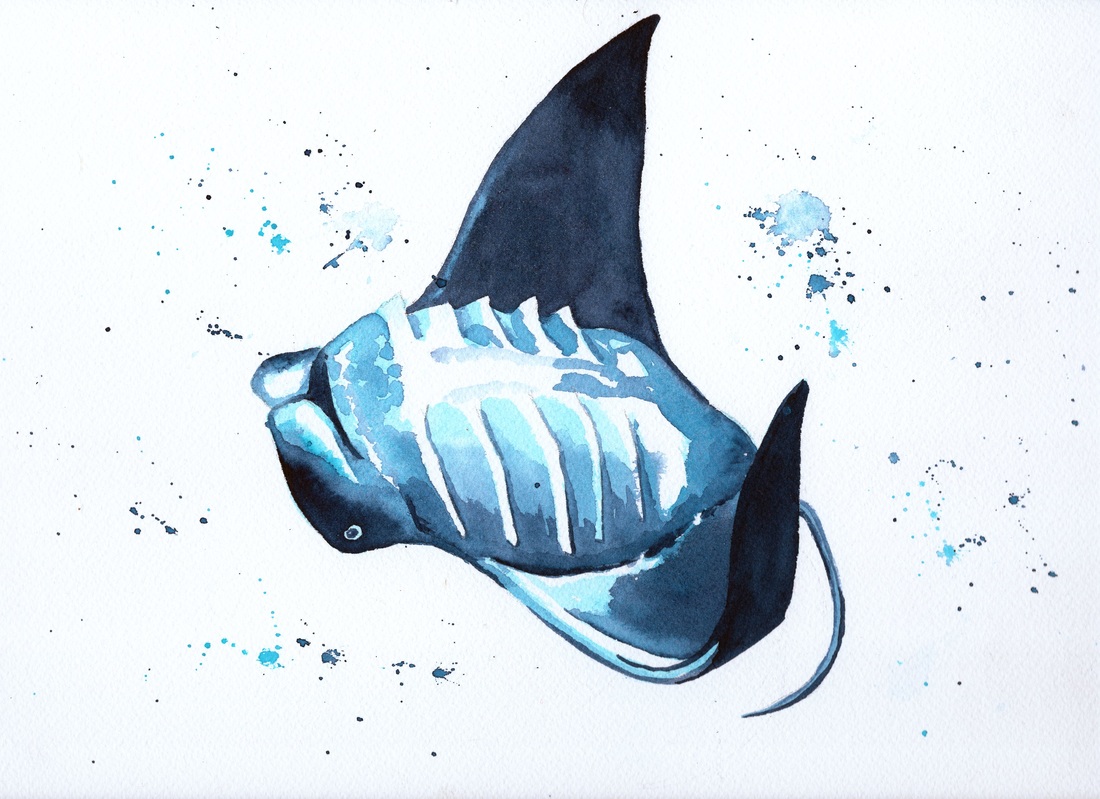 On drizzly days, I've been pulling out my photos from diving and snorkeling trips, and painting watercolours of some of my favourite sea creatures. 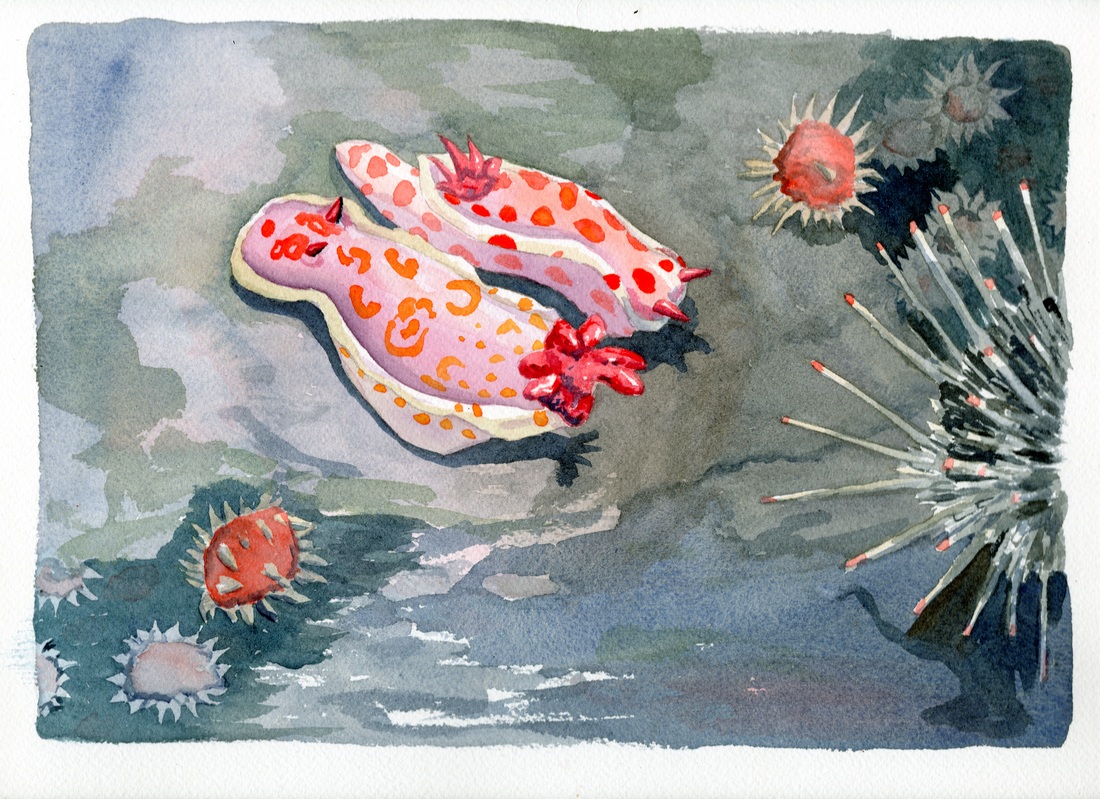 The difficulty with taking photos when diving is that things often get a bluish cast, or backscatter from the flash unless you have external strobes. My budget definitely does not extend that far. So I figured I can take some of my favourite pictures and express them in water colour. 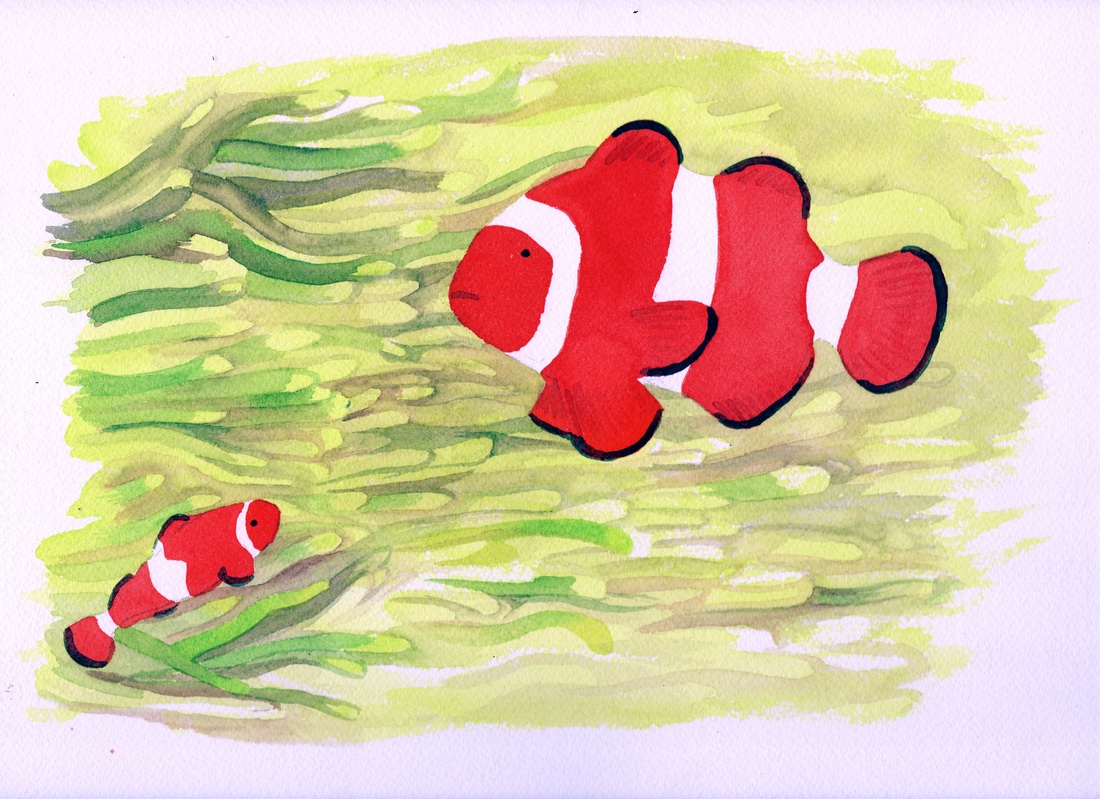 The aquatic backgrounds have also got me playing with negative painting. It's a relatively new concept to me, and one I stumbled upon in a Collins guide to painting flowers- suddenly I realised how many of the artists I love create their subtle layered backgrounds! I didn't pull it off so well with the clownfish, but I'm pretty happy with how it turned out on the nudibranch painting above. 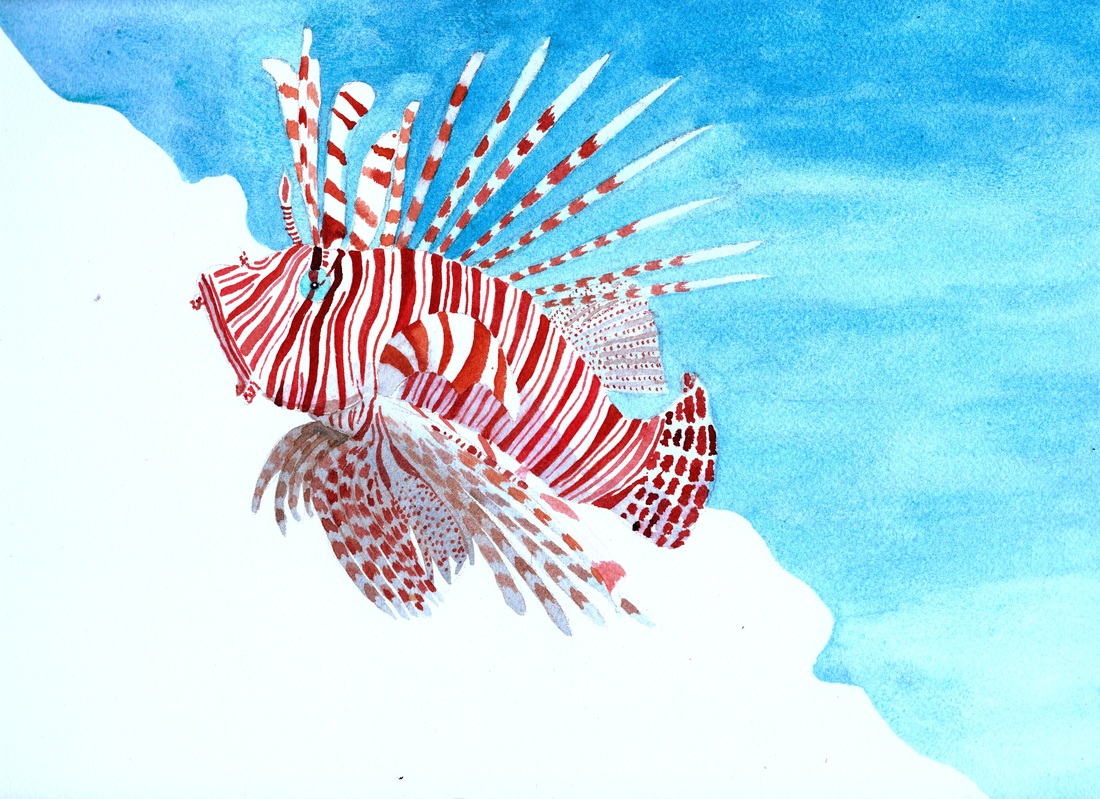 With the lionfish, I committed the cardinal sin of completing the water and the fish before I touched the reef. Now I'm really worried about getting the reef colours wrong, unbalancing the image and losing the impact of the lionfish. Maybe some gentle green-grey outlines will suffice... or perhaps I'll leave it like this and enjoy the clean zing of what I've done. What do you think?
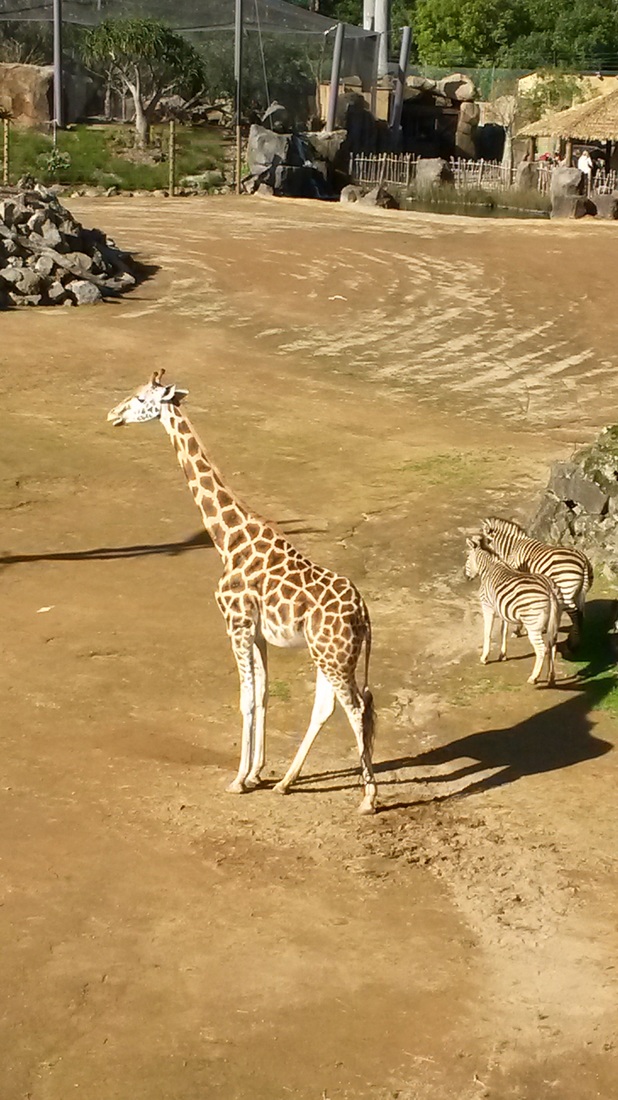
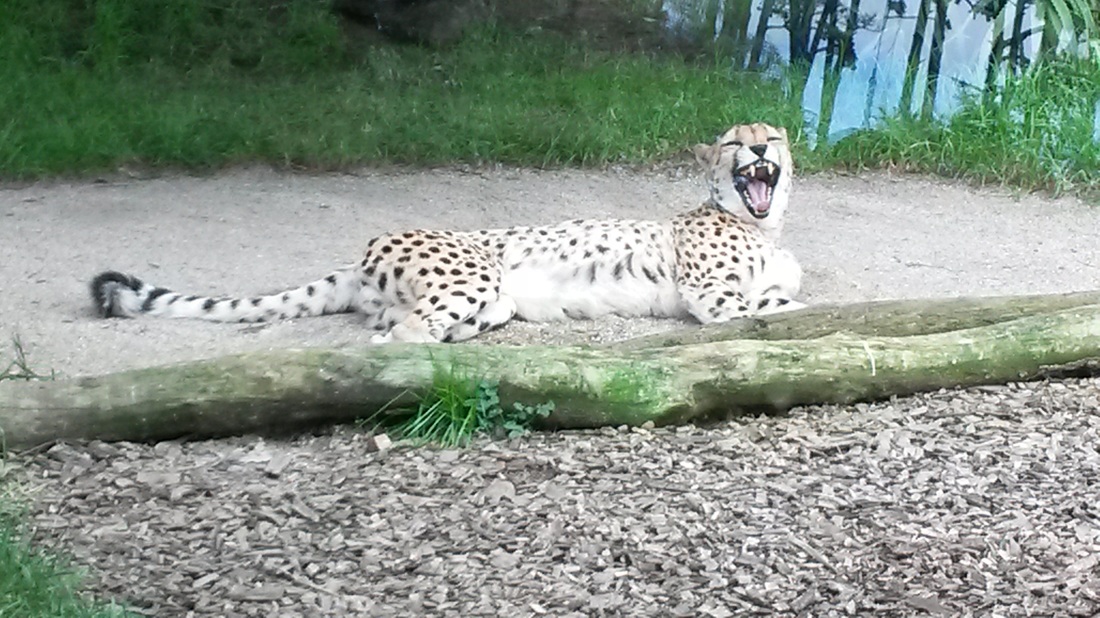
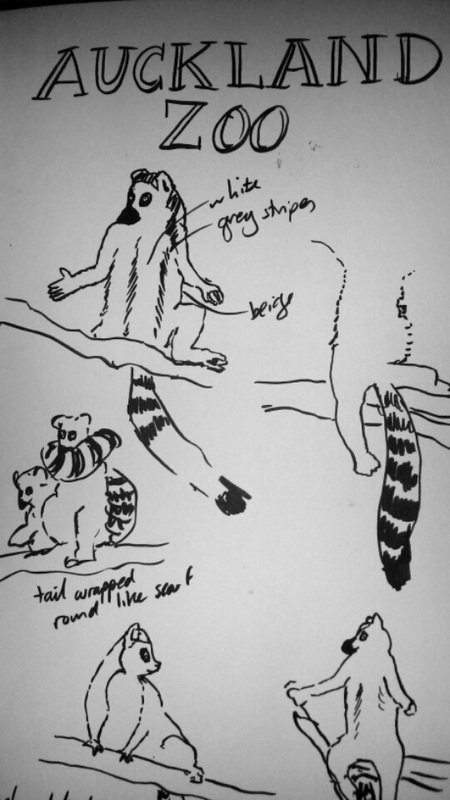
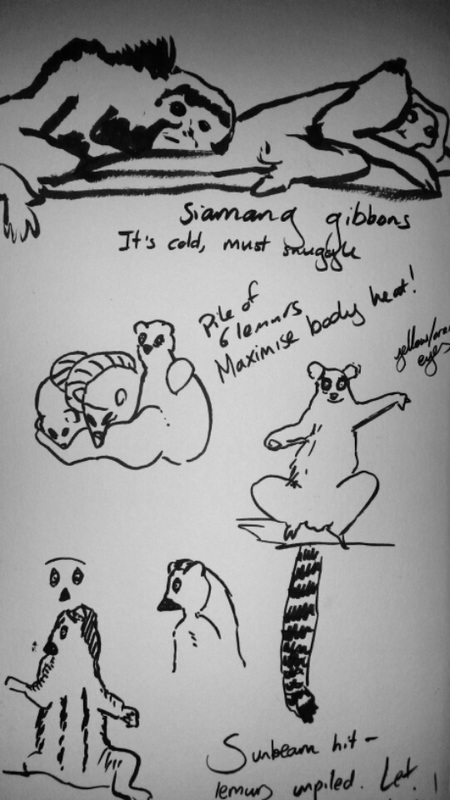
School holidays have rolled around. To kick mine off, I headed to Auckland Zoo with my friends Jill and Ethan. It was a clear and chilly day, with the side effect of upping the cuteness factor as we came across hugging gibbons, huddles of squirrel monkeys and a pile of lemurs. What looked like 3 animals in a tangle of tails and long legs turned out to be 6- who were overjoyed when the sun came out. They swiftly unpiled and began to bask in that wonderful sun worshipping way that lemurs and cormorants share. Despite looking like they were meditating, they didn't keep still for long and my brush pen and I had to work fast to get some sketches done! They weren't so keen when the sun went in. One even wrapped his friend's tail around his neck as a makeshift scarf. The cheetahs and tigers also graced us with appearances, and we were lucky enough to see three kiwi in the nocturnal house (plus an occasional frenzied flurry of bat). The kiwi were also on the move as they scurried round in search of bugs. They were surprisingly quick, but lots of fun to draw. The dark provided an extra challenge! Back home, the meditating lemurs stuck in my head. I drew one in a calm yogic pose, and decided that the monochromatic creature would look good in front of a warm coloured sun. I transferred the drawing onto acetate to create a stencil, then used a bowl to help me draw a circle. Cutting out the stencil was a little fiddly in parts, but no lemur limbs were lost. A lack of ink pads meant I ended up using acrylic paints for the stencilling. Either the material or my technique were not ideal- after three attempts I still seemed to get paint blobs under the stencil! It probably didn't help that I insisted on stroking rather than dabbing the paint- but I liked the effect more. 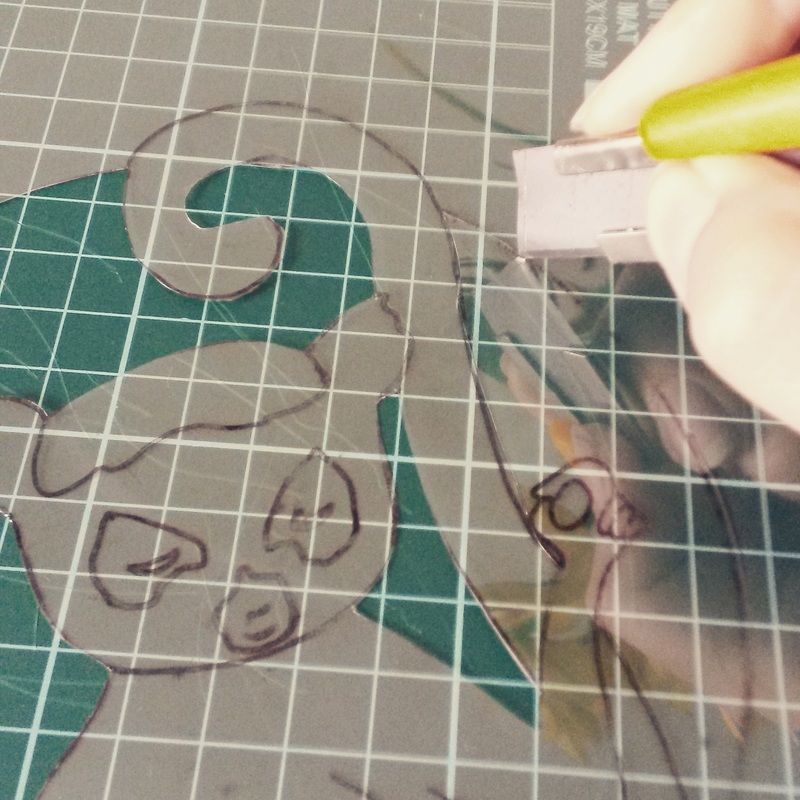 I had intended to try oil transfer printing over the top of my stencils, but the bright red and yellow suns seemed to call for something stronger- plus I wanted to hide the paint blobs if possible! I decided my Pentel pocket brush pen would probably be my friend. As hoped, I got lovely expressive lines and was able to hide the occasional blobby bit of paint. then I reached for my Pitt pens to add a relatively even grey.  Meanwhile the idea of scarves as tails was rattling round my head. This time I went straight for the pen to create a little hat and scarf-wearing lemur. Somehow, giving him an ice cream felt right. He was also the perfect creation to try out my new wacom tablet- Photoshop is a bit of a learning curve but an extra layer and some playing with brushes gave him a little extra polish. 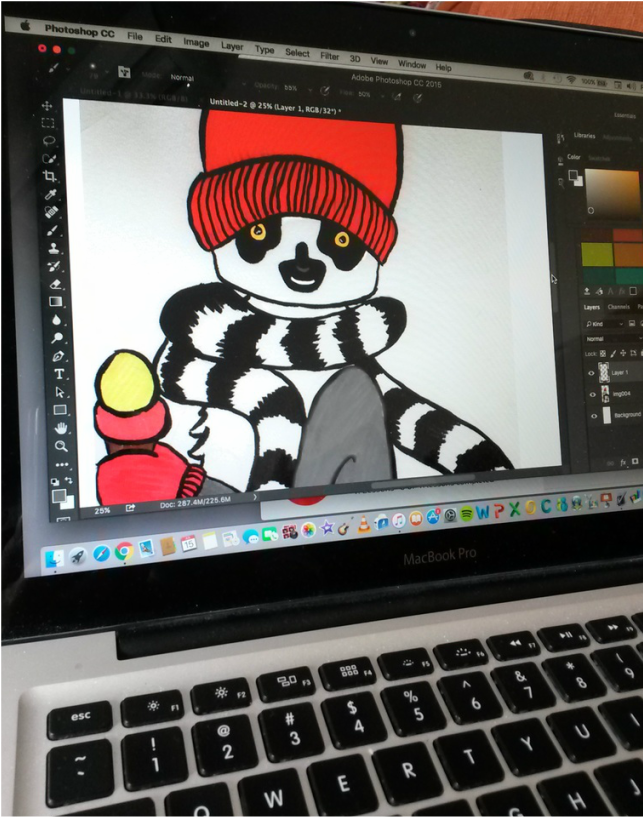 |
Andrea England
An Artist Afloat- Painting the world one anchorage at a time. Archives
August 2020
Categories
All
|


 RSS Feed
